
Contacts
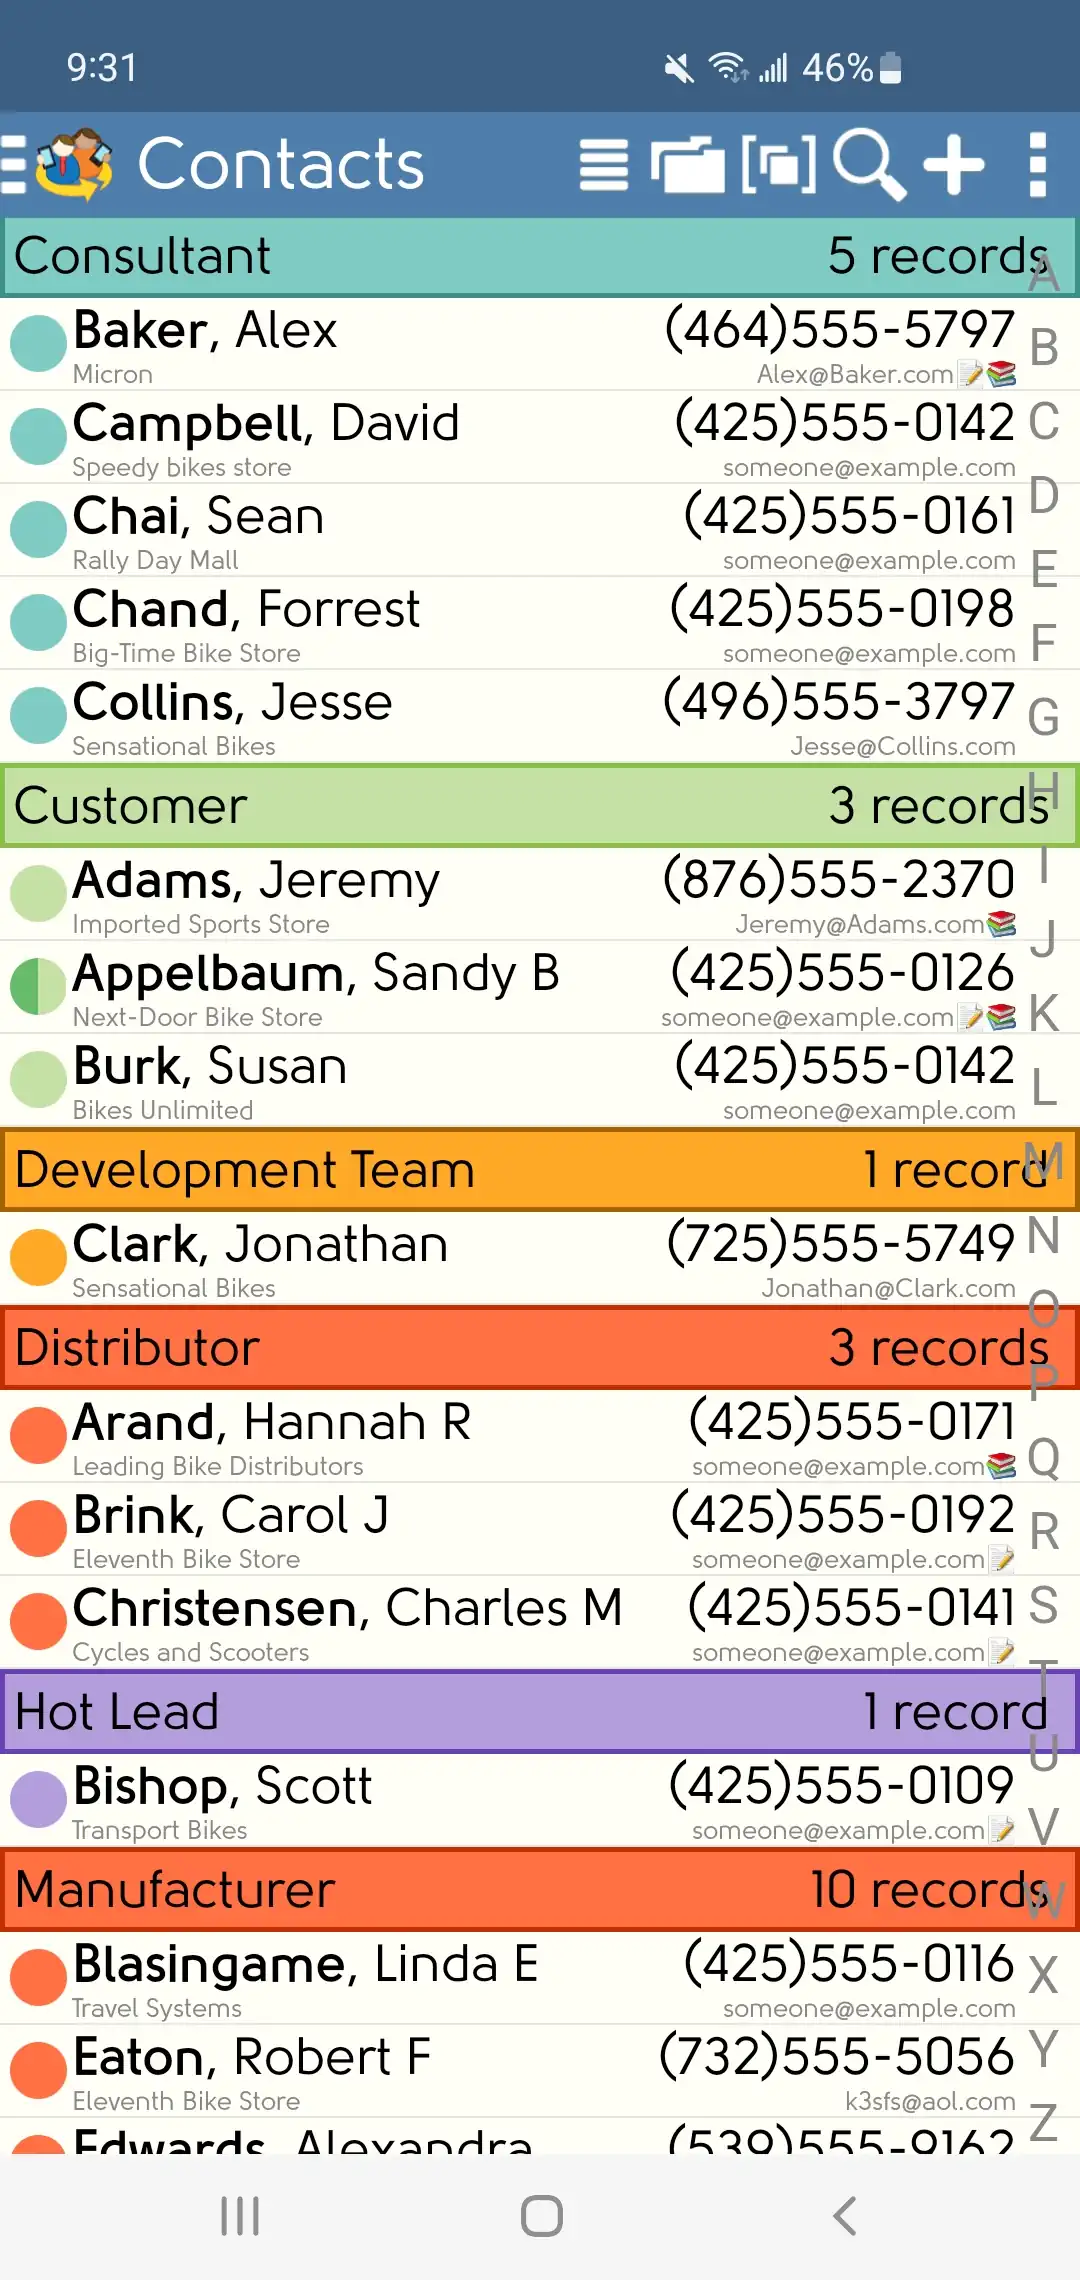
DejaContacts is an address book focused on productivity and maximizing screen space for information display. The image on the right shows you how your Contact List appears in DejaOffice.
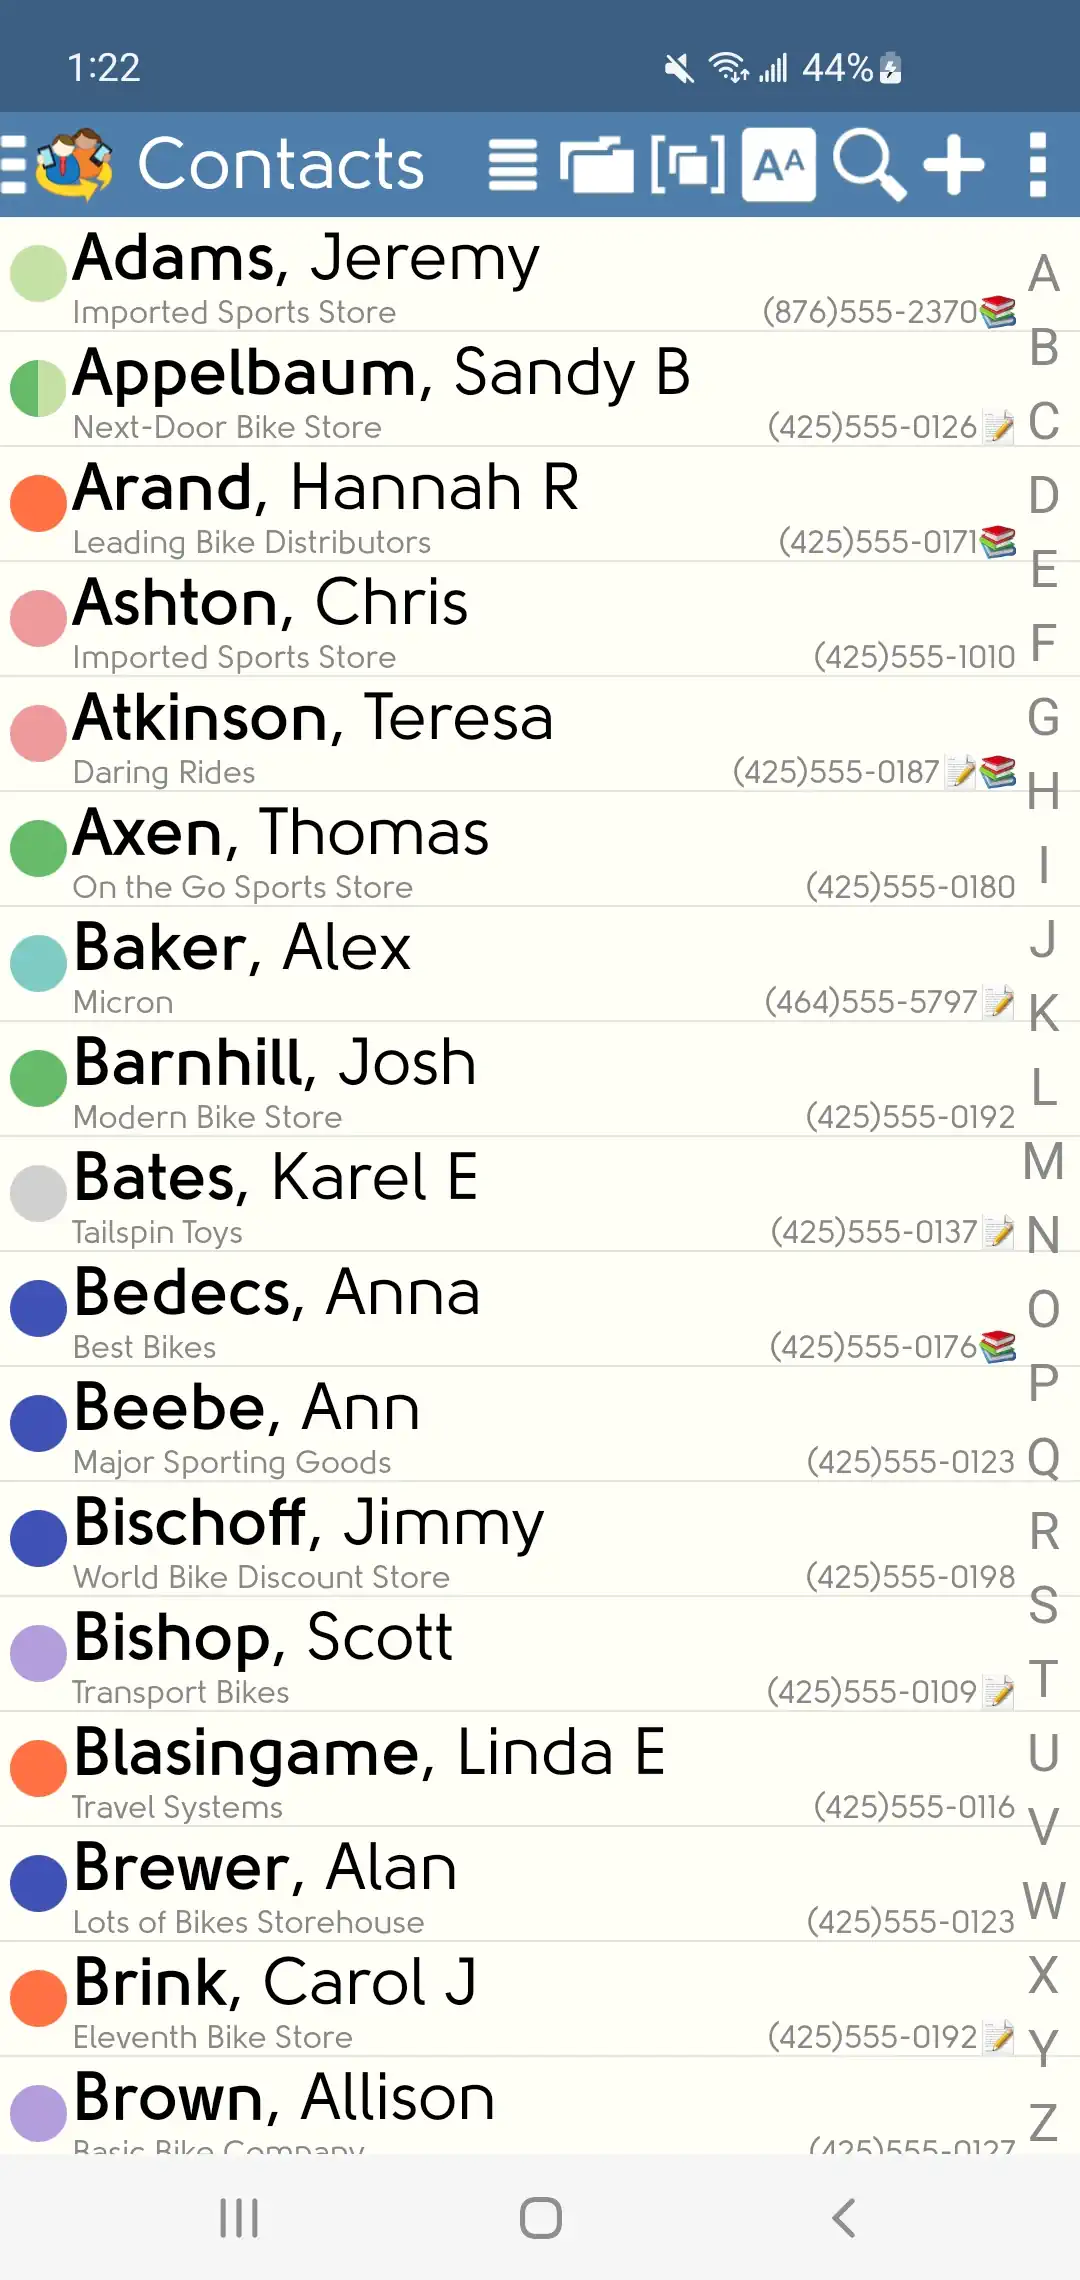
Each contact displays phone number, company name, contact photo, and color-coded category. The information displayed is more comprehensive than the built-in Contacts app on Android devices.
Swipe up and down the contact list to scroll, or swipe along the right edge of the screen for accelerated scrolling.
Add New Contact

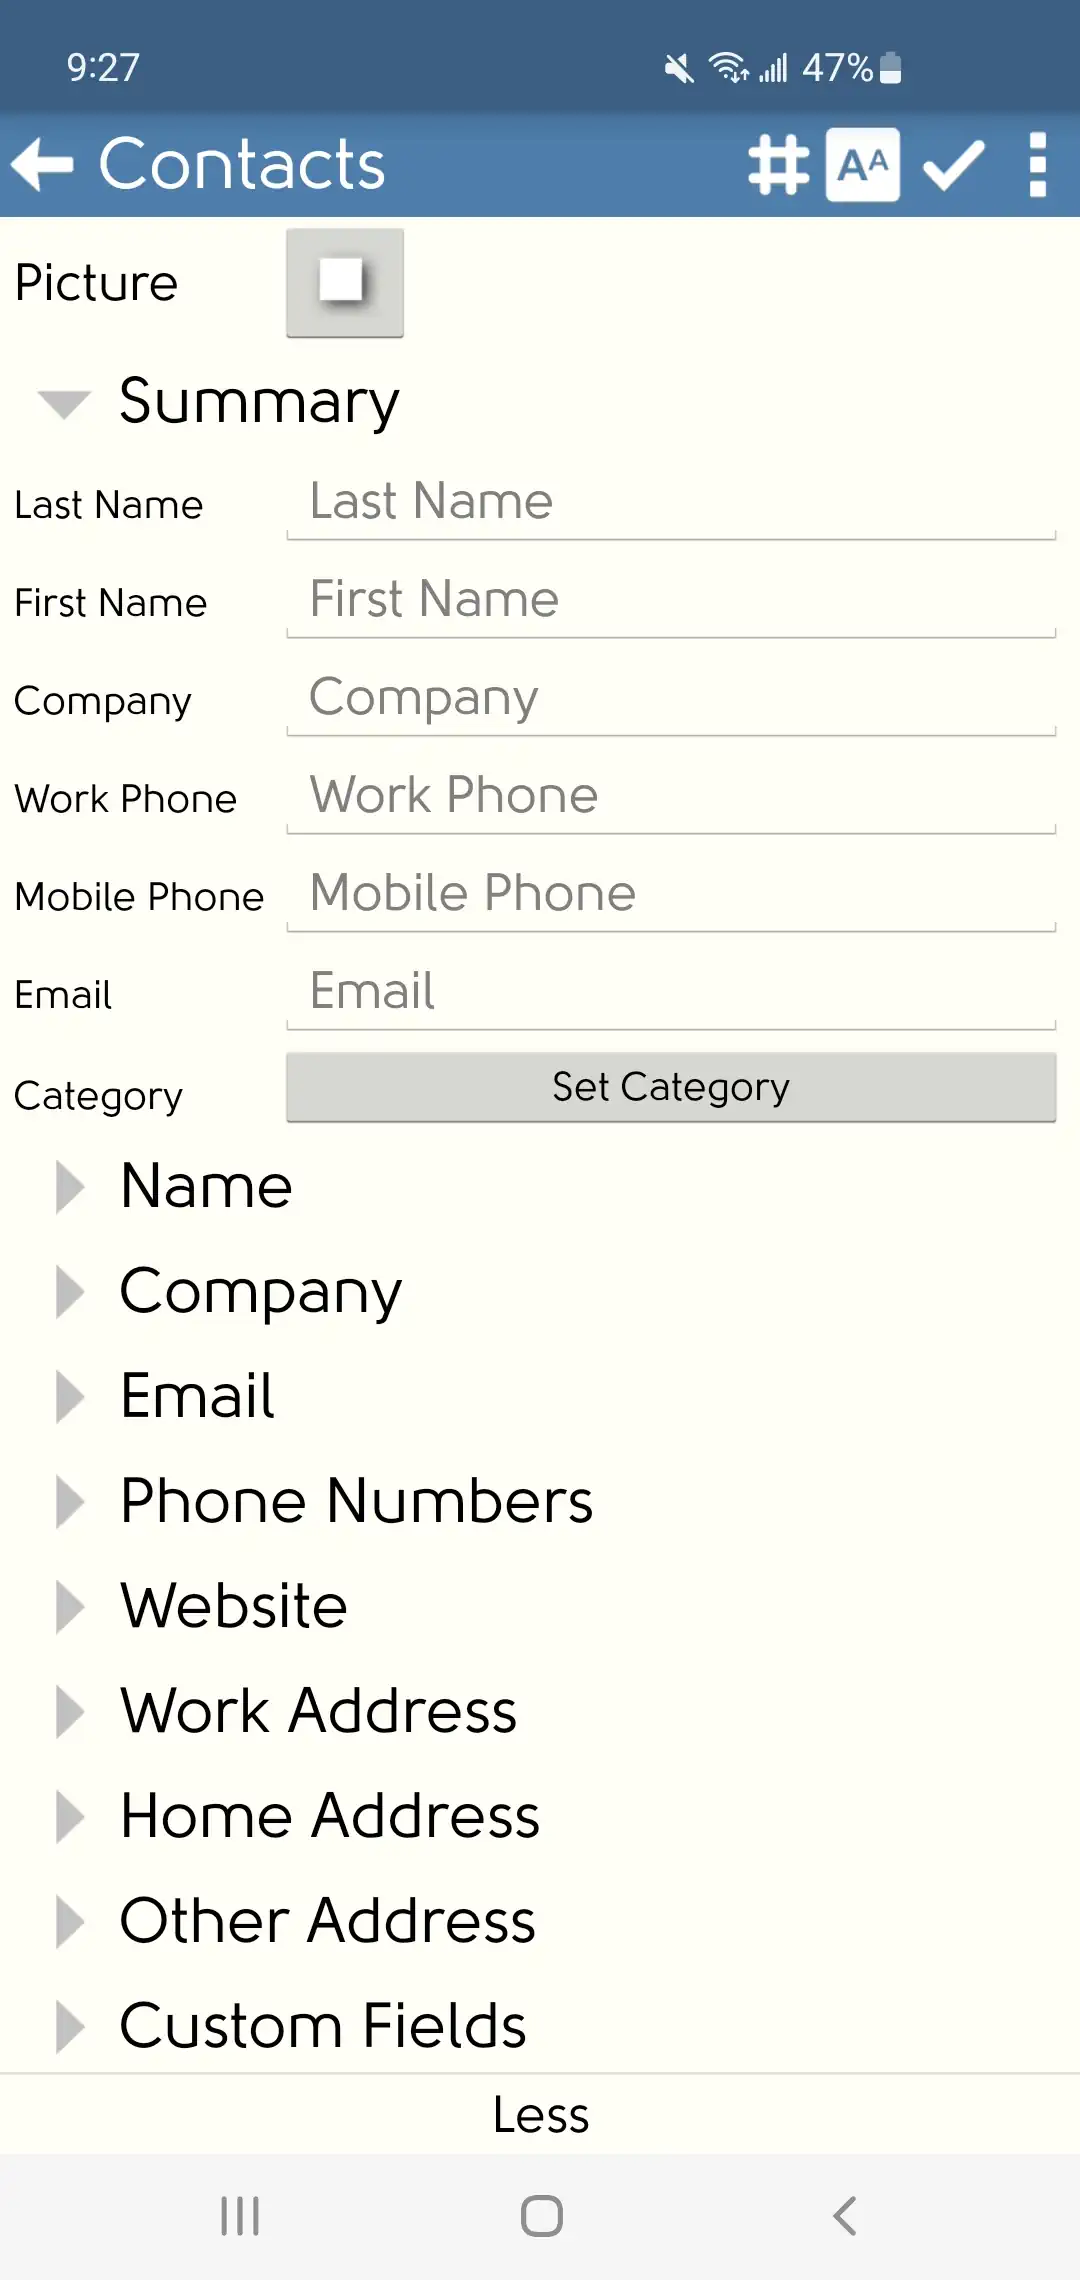
Tap the plus symbol up in the top-right corner to add a new contact.
The add contact screen lets you input name, multiple phone numbers, email addresses and addresses, company name, and much more. You can also assign the Contact to one or more Categories from this screen.
By default the Contact Edit will load the "Quick Edit" with just a few fields shown. To see All Fields, tap the "More" option at the bottom of the edit.
To save your new contact, tap the check mark symbol in the top-right corner.
Scan Business Cards
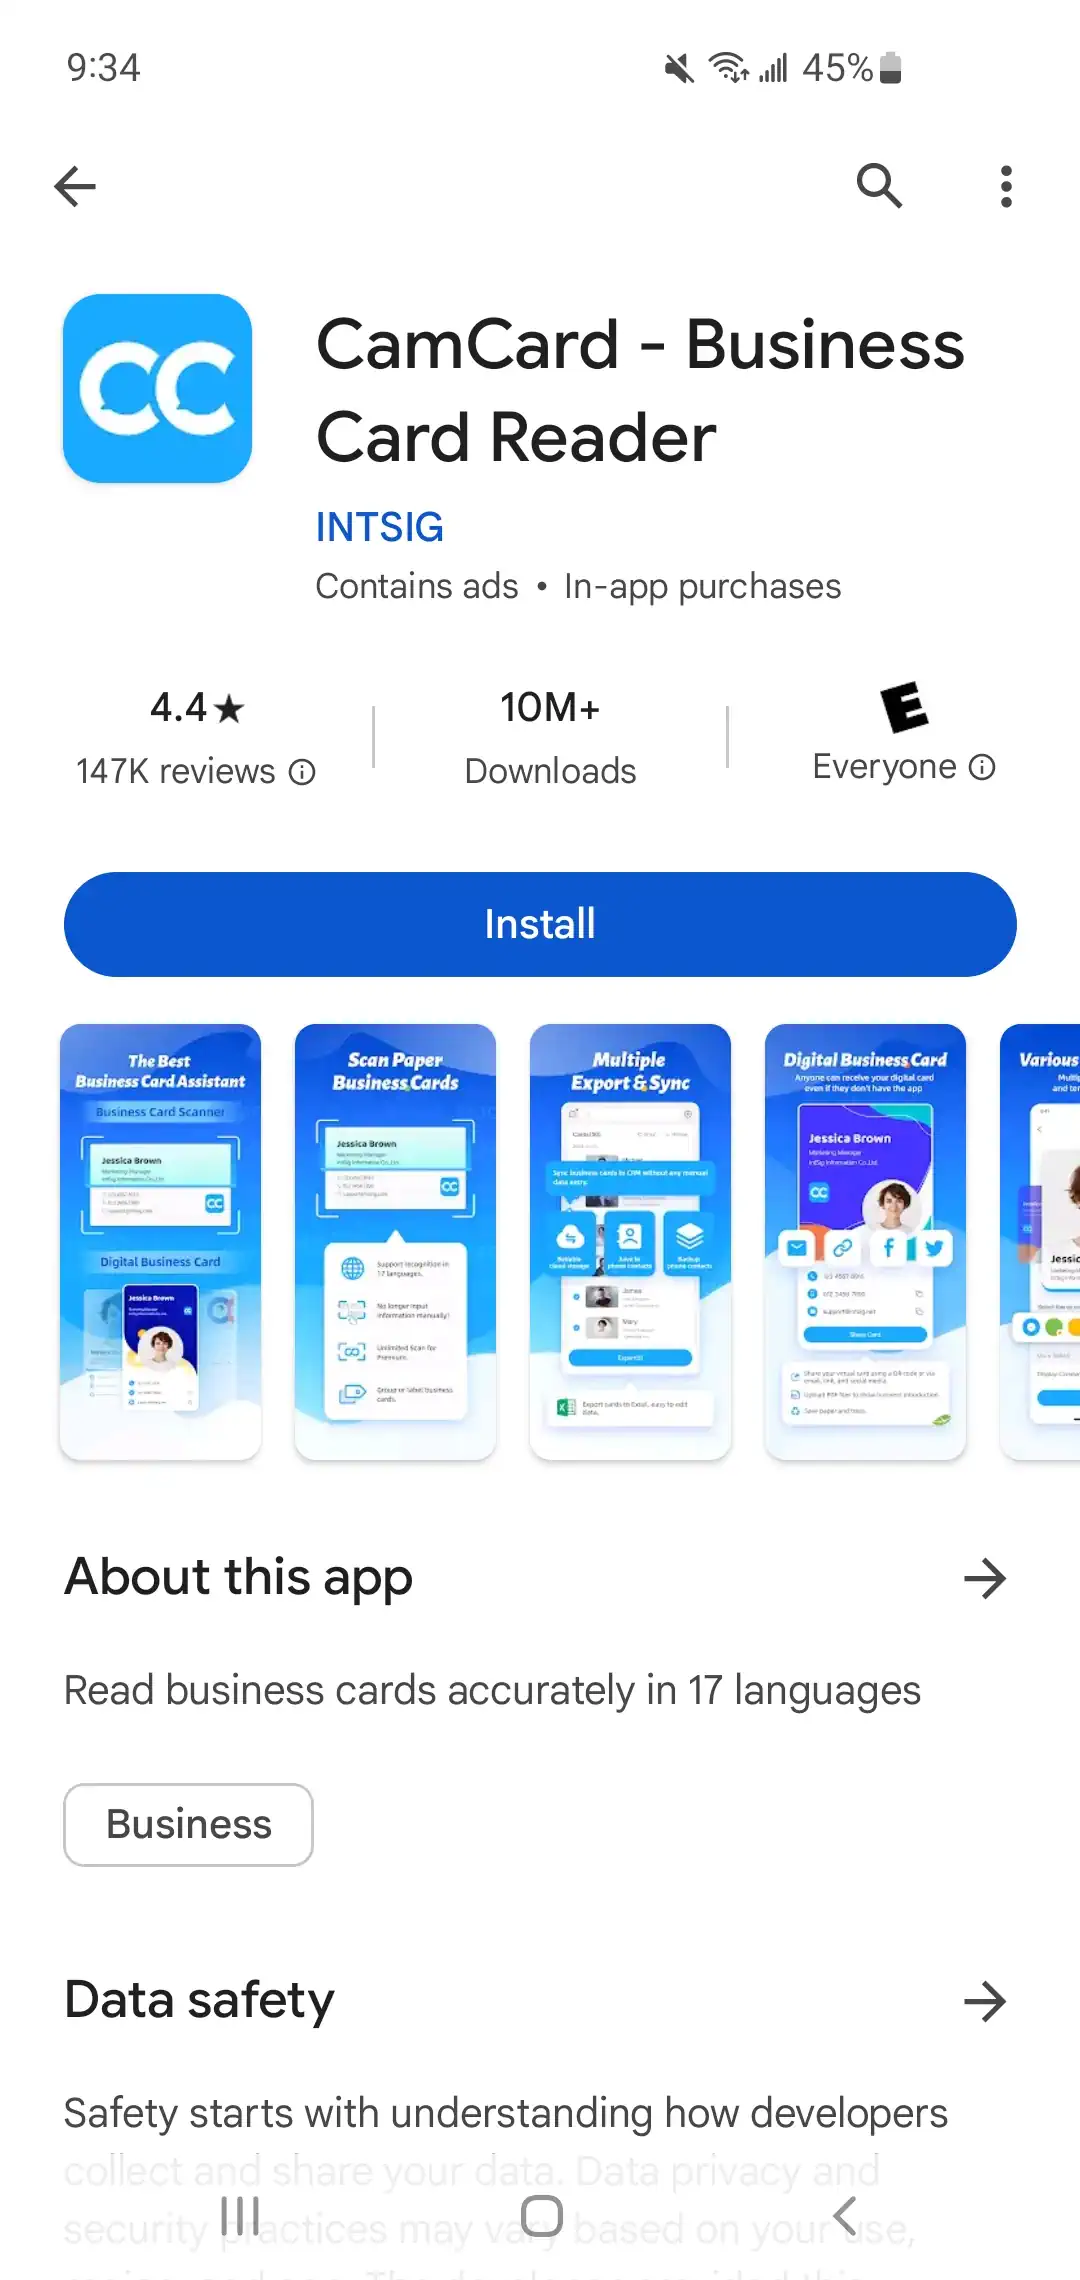
Step 1: Install CamCard & create new contacts in the Android Contacts app
- Install the CamCard application from the Google Play Store
- Using the "Take a Photo" feature, photograph a business card and save as a new contact
- Tap on 'Save to account' to choose what account to save the photo to. We recommend you choose the DejaOffice account
Step 2: Synchronize DejaOffice Contacts with the Android Contacts app
- Open DejaOffice Settings > Sync Settings > Check to Sync with Android Contacts
- Under Sync with Android Contacts, tap on Contact Account
- Select the same account that you selected to save the CamCard record to. The default account is DejaOffice.
- The next time you do a synchronization, the synchronization between DejaOffice Contacts and the Android application will run.
Contact Details Screen
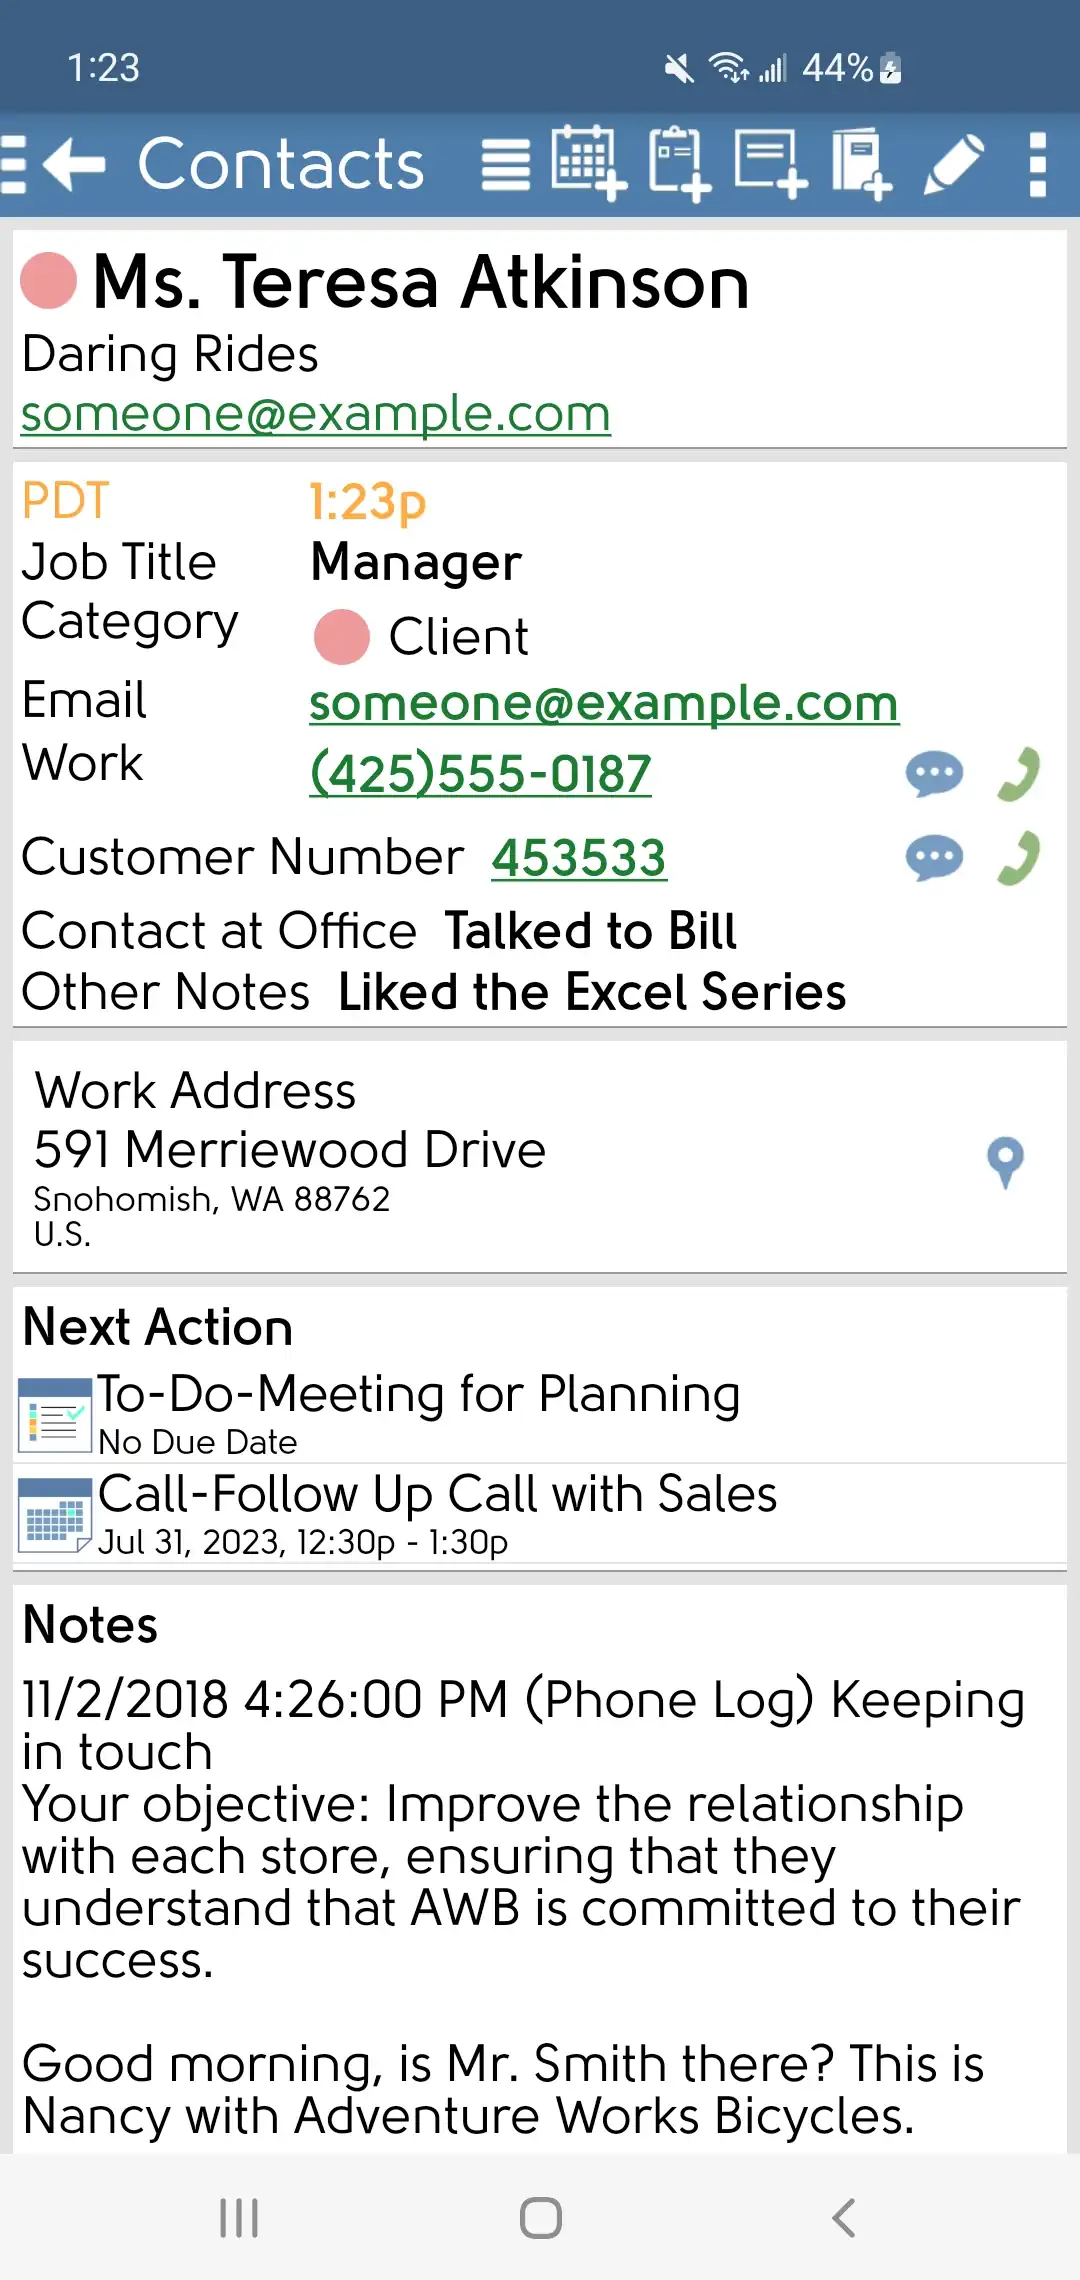
Tap any Contact to bring up the contact details screen. In our latest UI 7 all relevant linked Events, Memos, and History will be displayed on the main Contact Detail Panel
In the Details tab, you can tap phone numbers to call someone, email address to send an email, street address to map their location, or websites to launch the browser on your device.
To edit contact details, tap the pencil button in the top-right corner.
Changes made to the Notes field will display Notes header in the detail panel.
You can customize how many Up Coming or Past Events, History and Note lines show in the Contact Settings.
Contact History
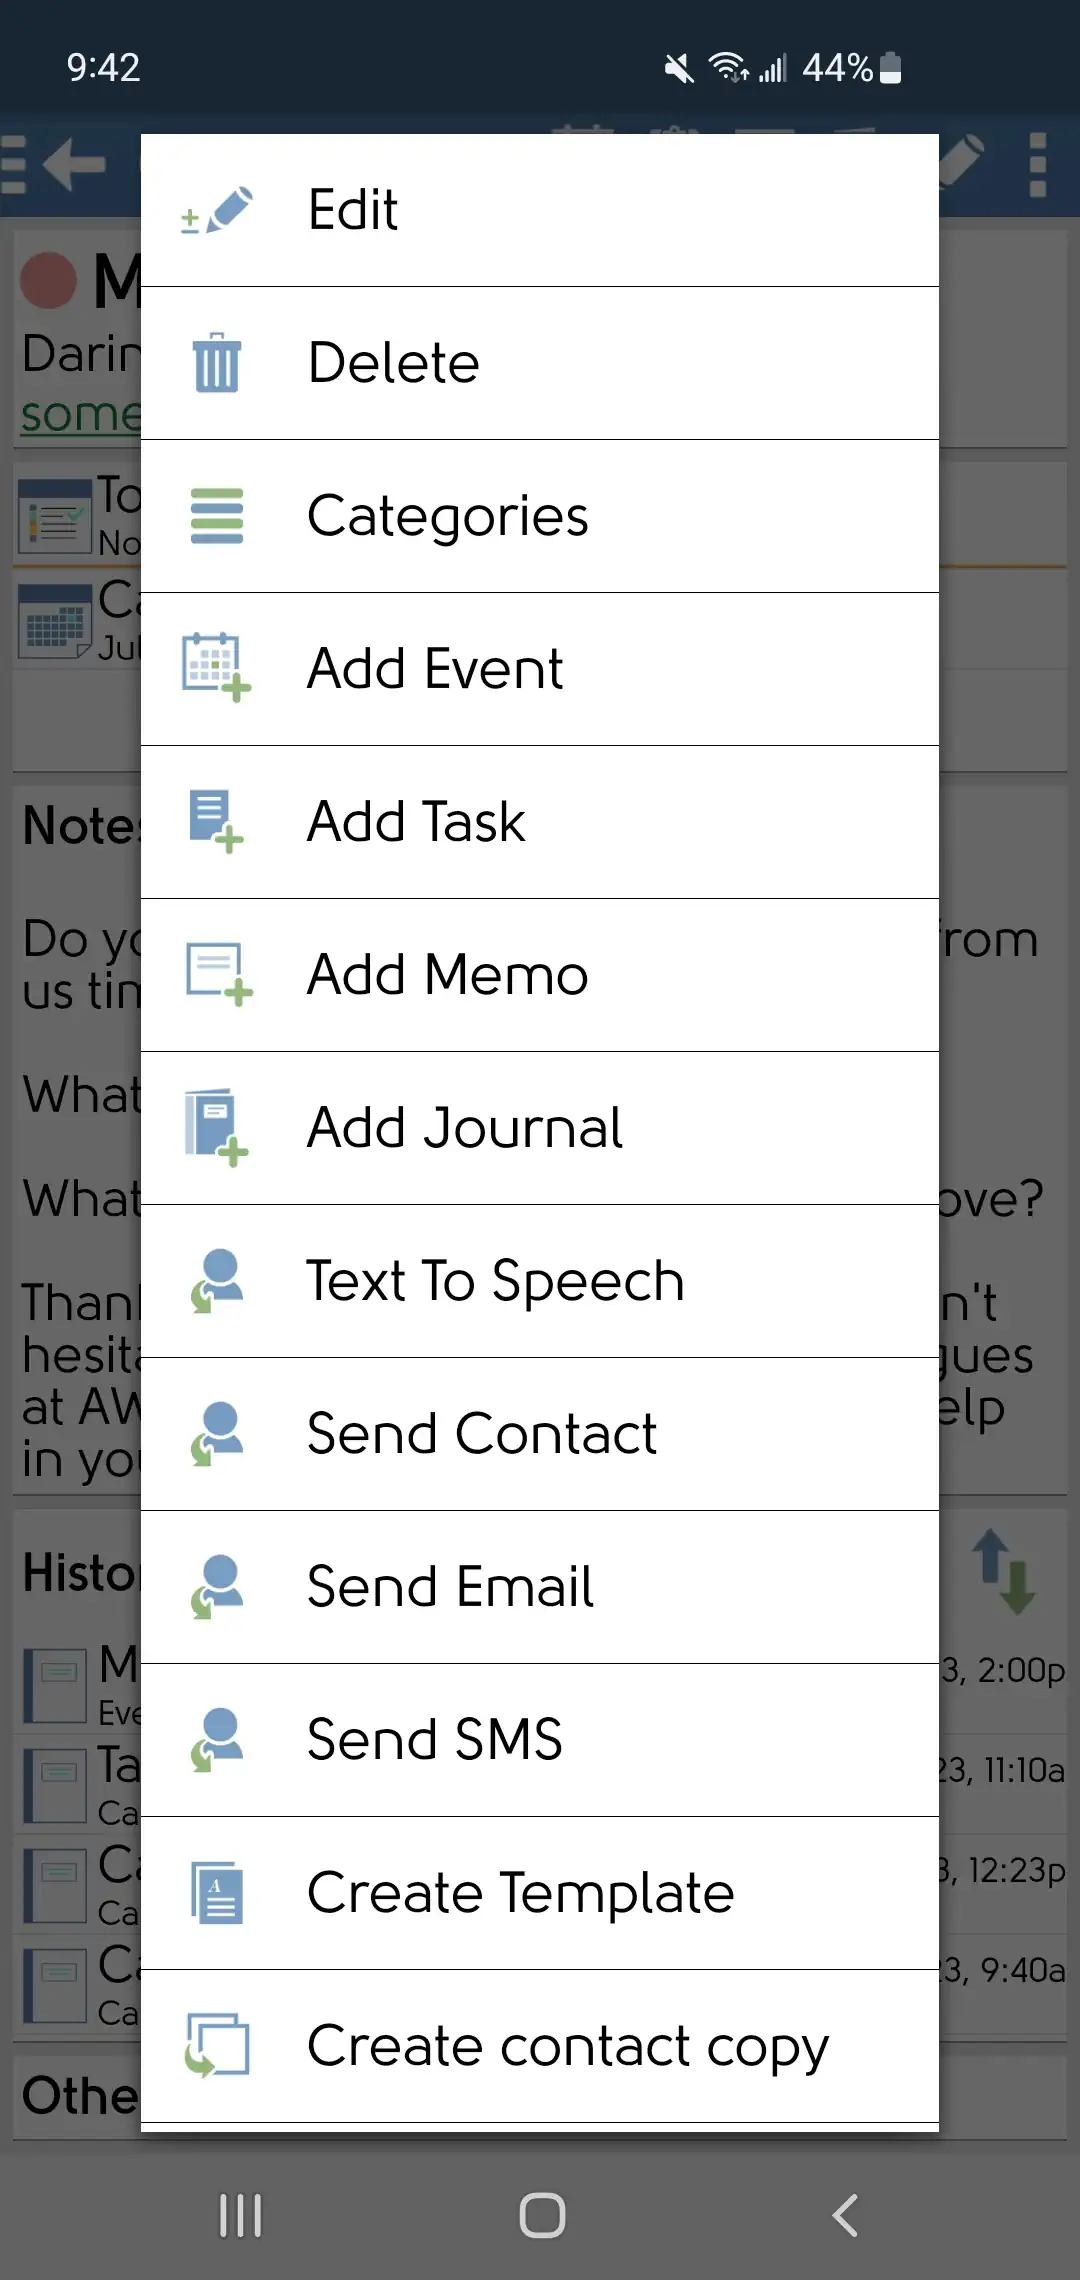

DejaOffice can keep a detailed history of your interactions with each contact.
The Contact Detail displays any event, task, or memo that has been linked to the contact. The History Section also displays linked Journal entries.
When viewing a contact, tap the Menu button (three vertical dots) in the top-right to open the context menu where you can link new calendar events, tasks, memos, and journal entries with that contact. These items are automatically added to the detail section for that contact.
Search Contacts
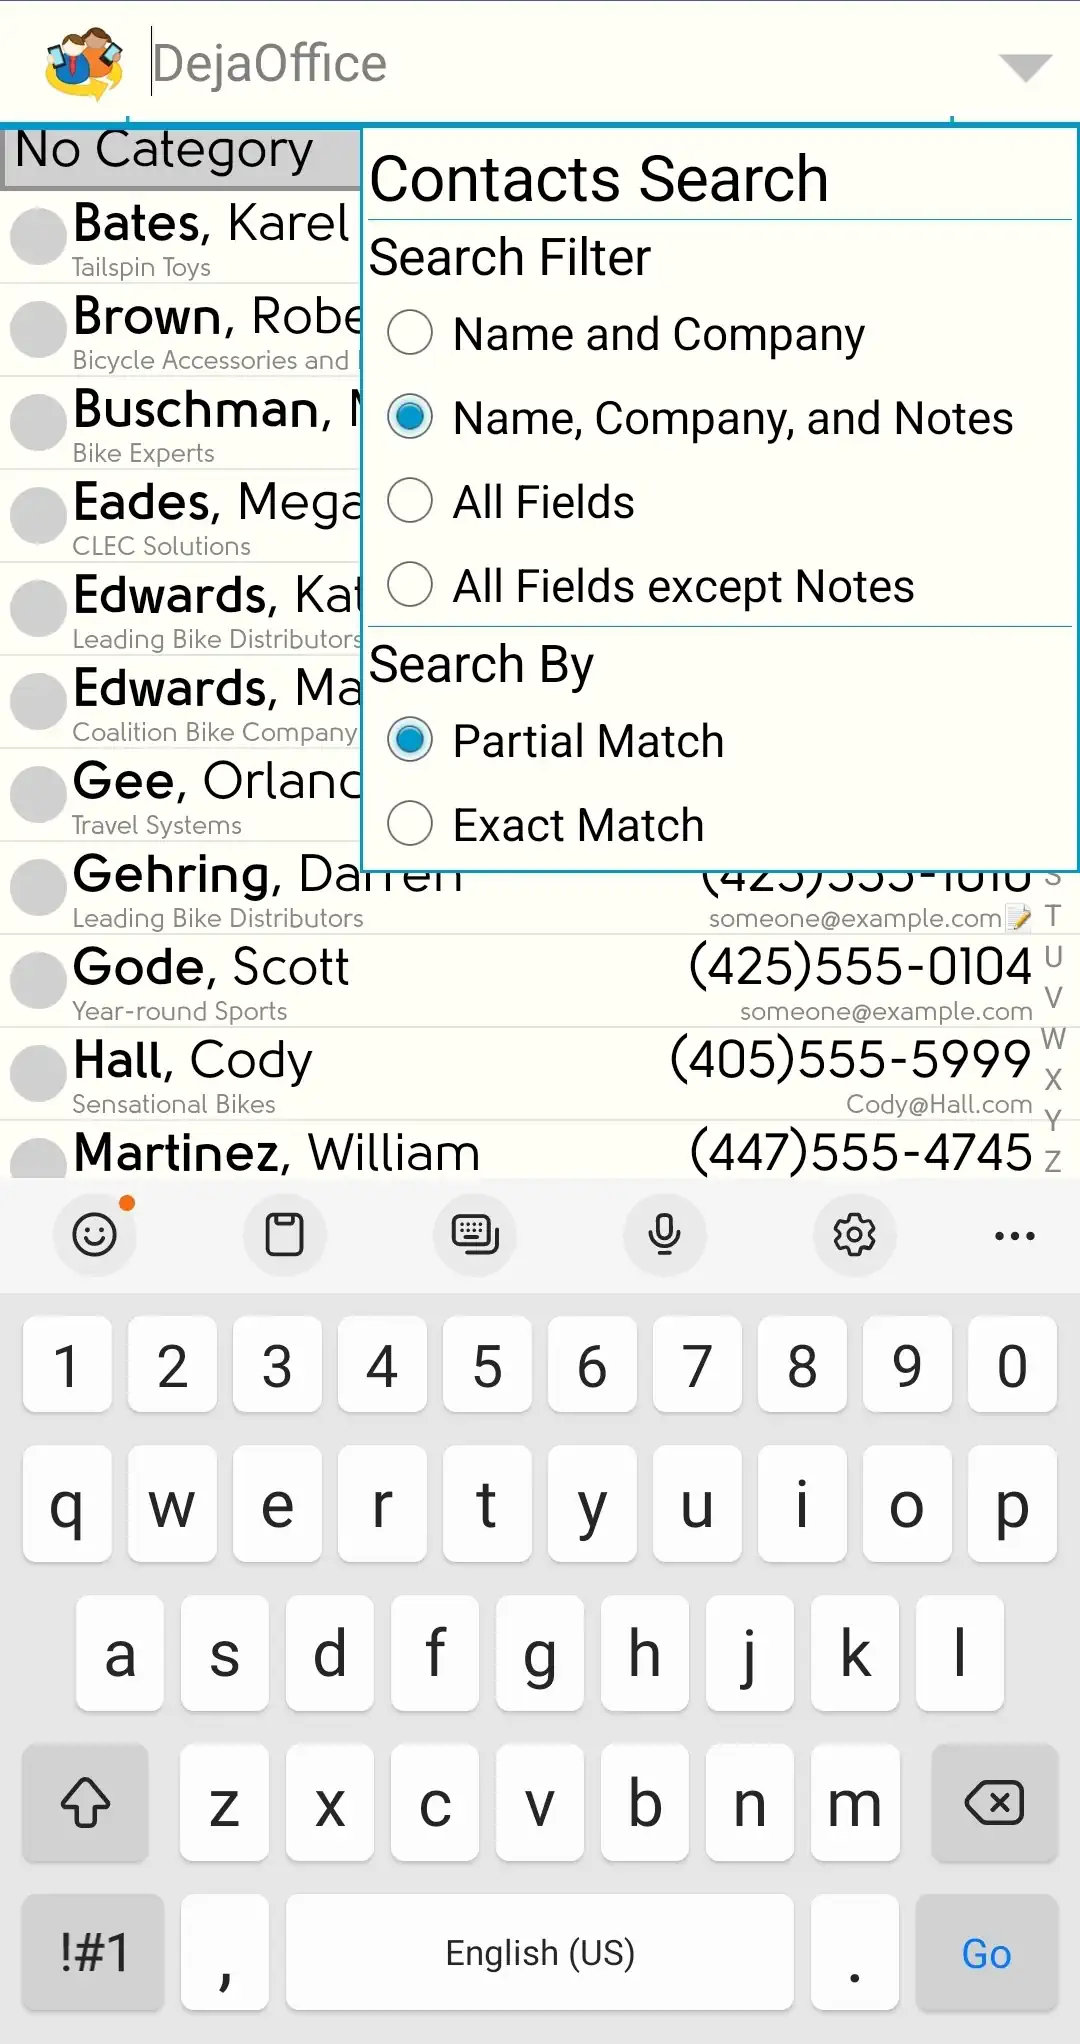
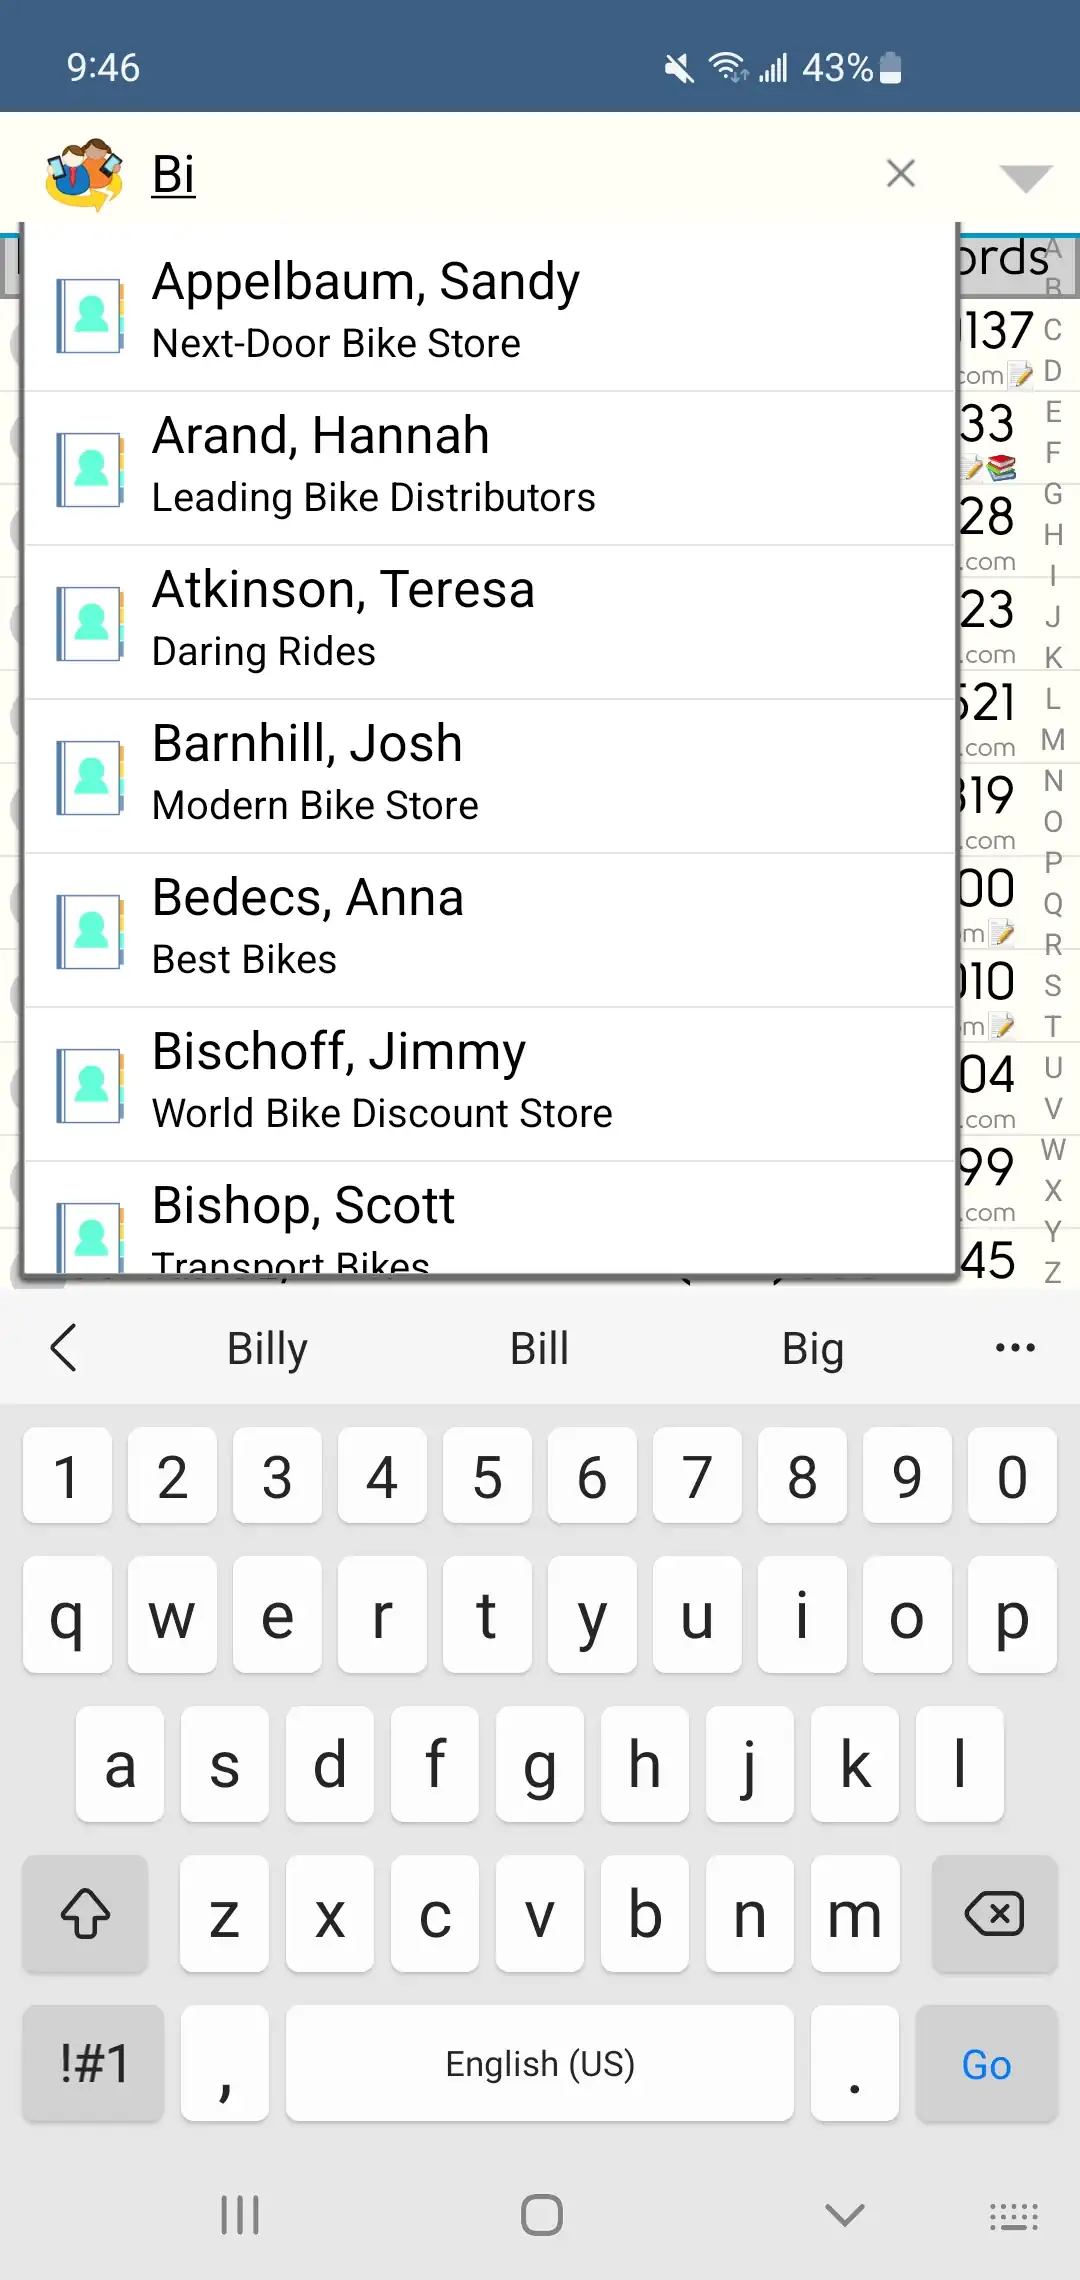
Tap the magnifying glass icon to Search. Results are filtered as you type.
By default, DejaOffice will search the name, company, and notes fields of every contact.
Advanced Search Filters (Android Only): With the Search Bar open, tap the down arrow in the top right, you can quickly set what fields are searches and if you want a Partial or an Exact match on your Search.
Sort and Group Contacts
While viewing the contact list, tap the Menu button (three vertical dots) in the top-right to select your 'Sort by' and 'Group by' preferences.
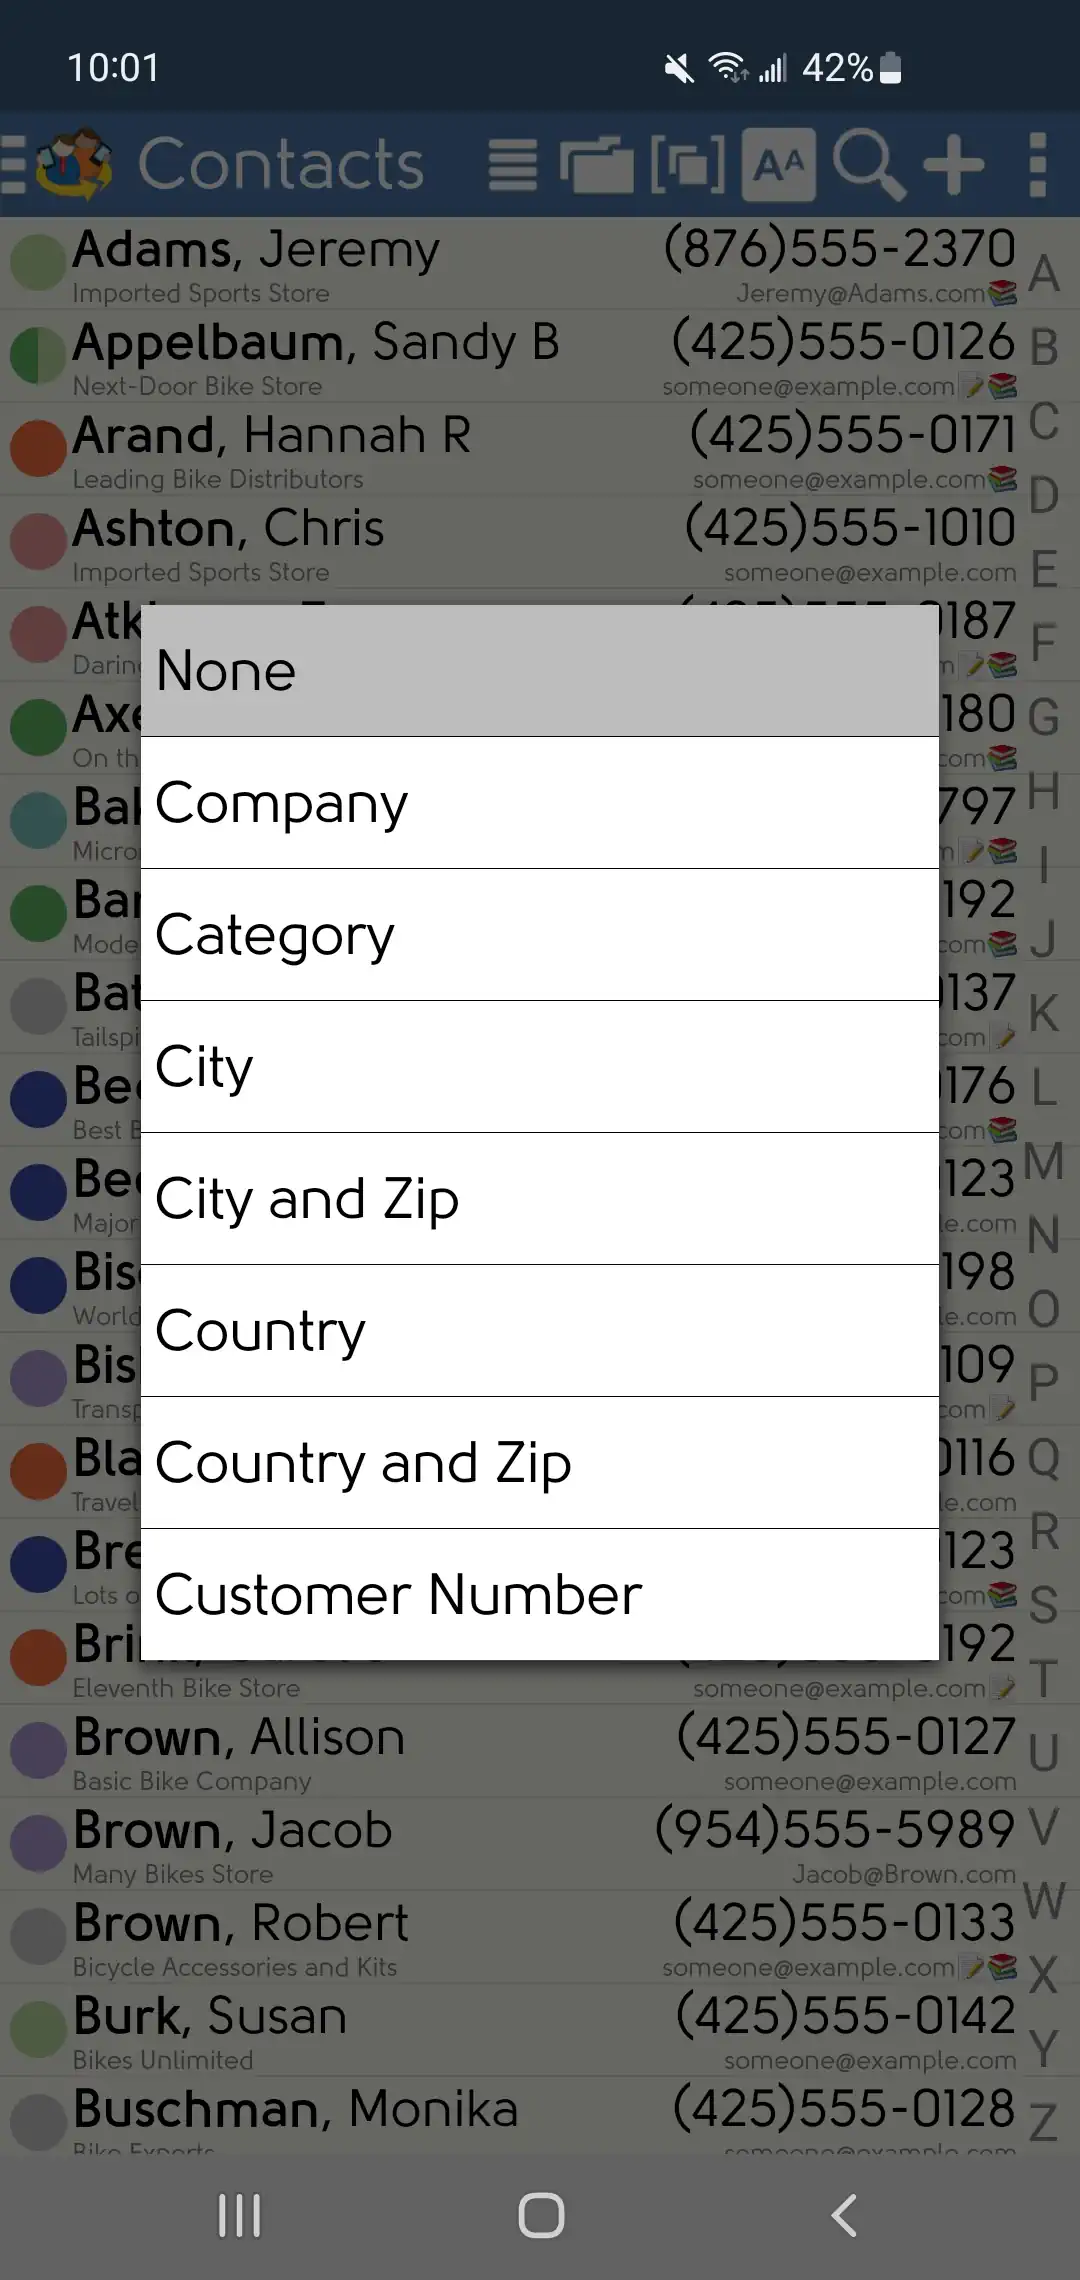
DejaOffice allows you to sort and group your contacts in a many ways. Sort by First Name, Last Name, Company, Nickname, or File As. Group by Company, Category, City, or City & Zip.
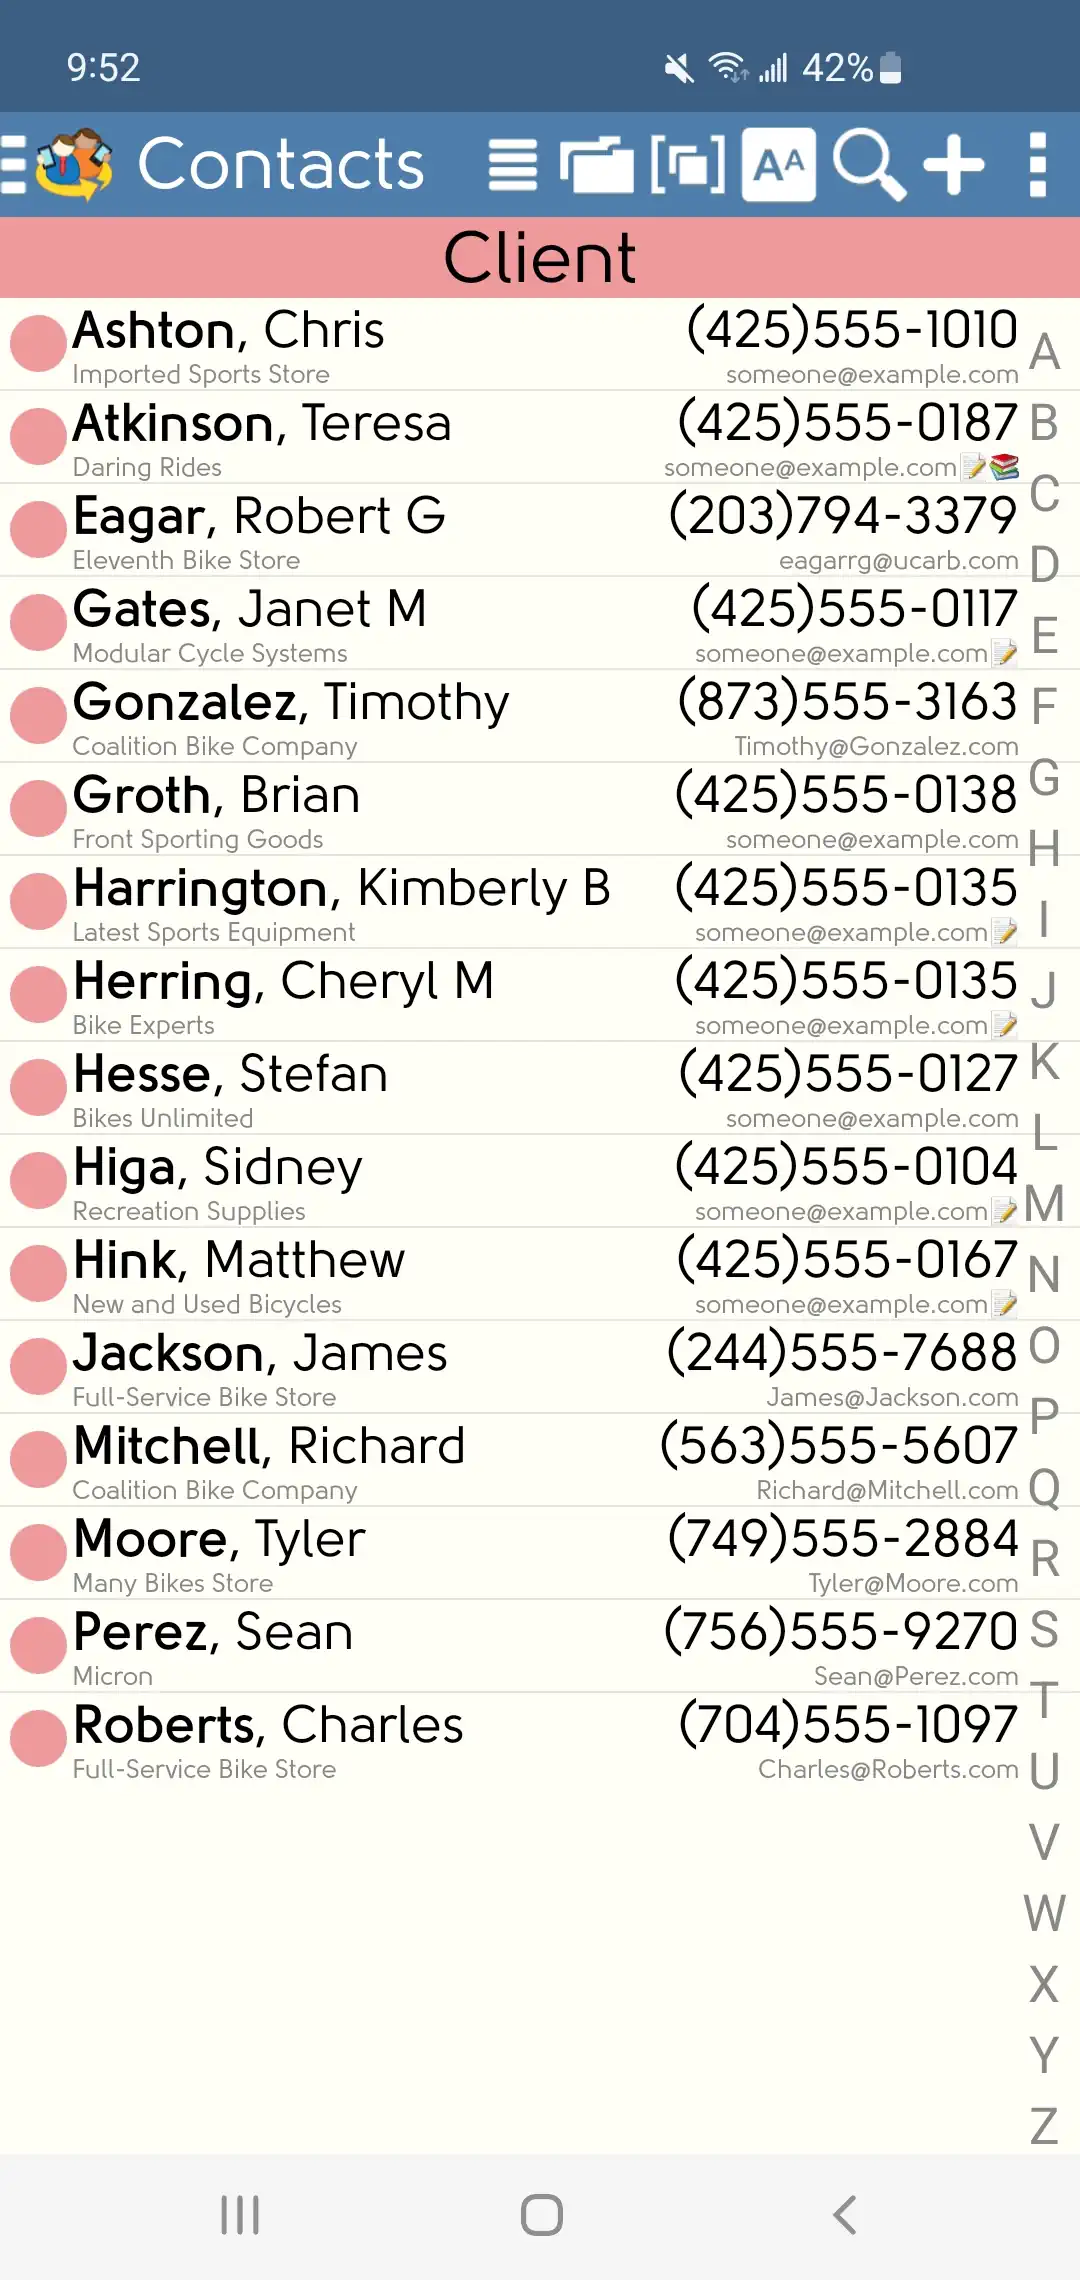
Filter Contacts by Category
Tap the Menu button (three vertical dots) in the top-right and select Categories to bring up the list of categories to filter by. Select a category and DejaOffice will only display contacts in that category.
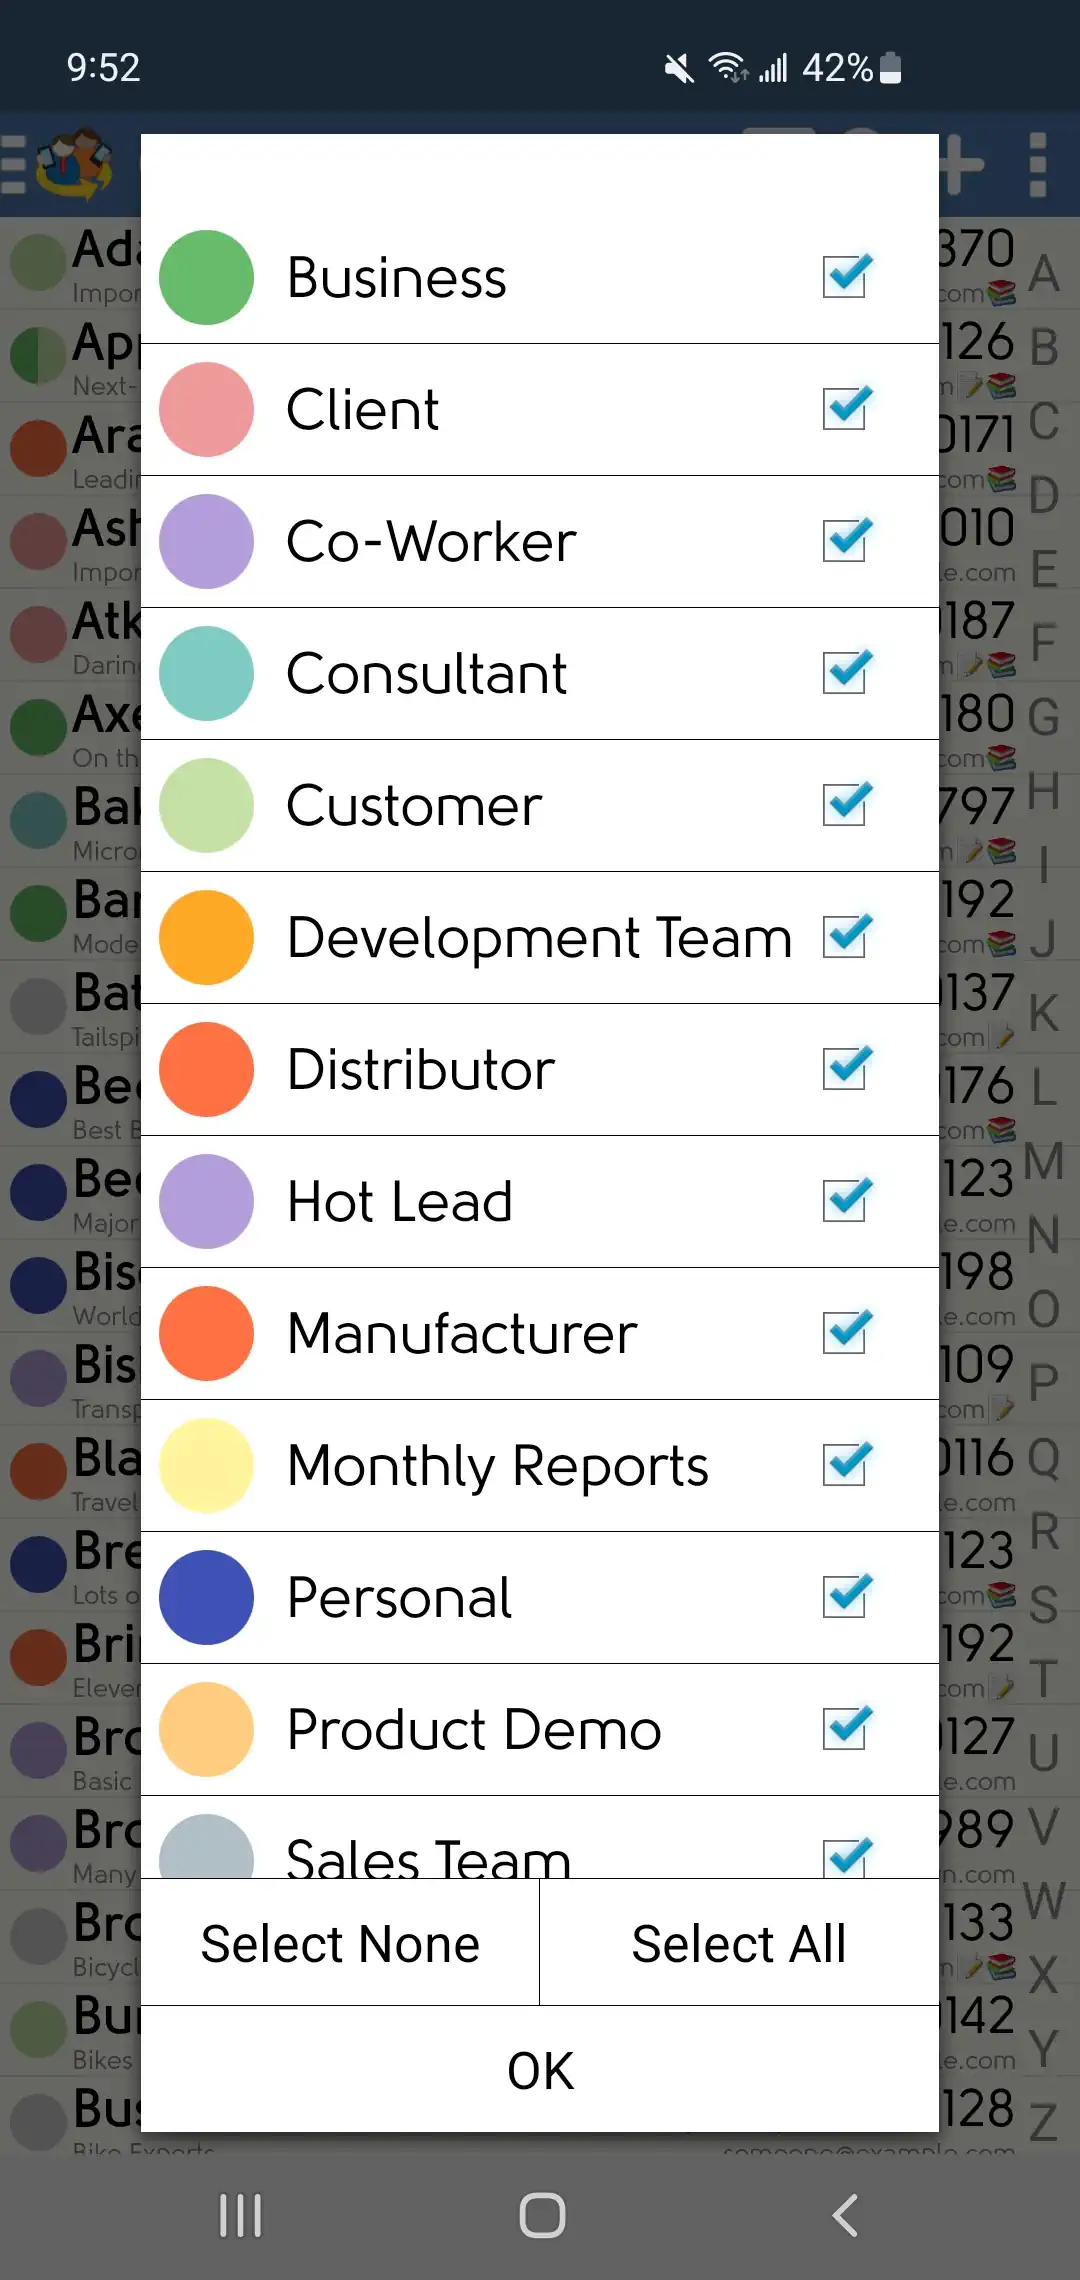
You can enable a Multi Select option to filter by Mulitple Categories in the DejaOffice Settings > Category Settings.
To view all contacts again, just follow the same process and choose 'All Categories' from the options.